

Custom Authentication
To handle complex auth scenarios, in the Create Authentication panel, set Authentication Type to API key in request / Manual Setup.
Then open the auth setting and select Add New Token. That allows you to specify which exact headers and parameters to use for each monitor using that token.
Note you can use variables (e..g. %%VARIABLE%% or VARIABLE) in these tokens.
You can also save values into the token to use as variables.
We also support an "EXPIRES_IN" value which will set the expire time to the current time plus the number of seconds of the integer value you specify. This allows us to use refresh token flows to ensure you always have a valid token.
Saving variables into an Auth Token
If you want to save variables into an auth token, first create a monitor that receives the values you need. Then you can use the Assertions section of that monitor's Edit tab to extract the values. Here is a standard OAuth setup:

Now in the Webhook tag, you can pick "Save Auth Token" and specify which token to use. Now when this API runs, the variables that are extracted by conditions are saved into the access token.

Open Browser instead to handle User auth
If you want to use a user auth flow to sign in to get an access token, we can support that from a workflow. Here's a complex user auth flow - the last step is the URL that a user would have to open in the browser:

Here's the monitor itself - note it is set up the same way as a standard call.

The difference is that it is tagged with apimetrics:browser from the Meta tab.

Now when this is run in a workflow by pressing the "Run Workflow" button, the monitor is skipped, and your browser window will redirect to the required URL with the correct parameters.

Note that you will need to use the Save Auth Token webhook to save your intended Auth token.
Callback handler
In combination with redirecting your browser window to start the auth flow, the callback handler at https://client.apimetrics.io/tokens/callback lets you handle the callback in an auth flow your own way. To open it from the sidebar, select OAuth Callback Handler under Project Settings.
The page lists the parameters passed to it in the URL, or in the URL fragment, under Parameters Received:

Under Variables to use, select Add... to add any variables to pass on. Then choose the workflow to run and, optionally, the auth setting and the token to update, and select Run Workflow.
The workflow will have the variables passed to it. Note that we automatically capitalize the variables, so access_token will map to ACCESS_TOKEN

Refreshing tokens automatically
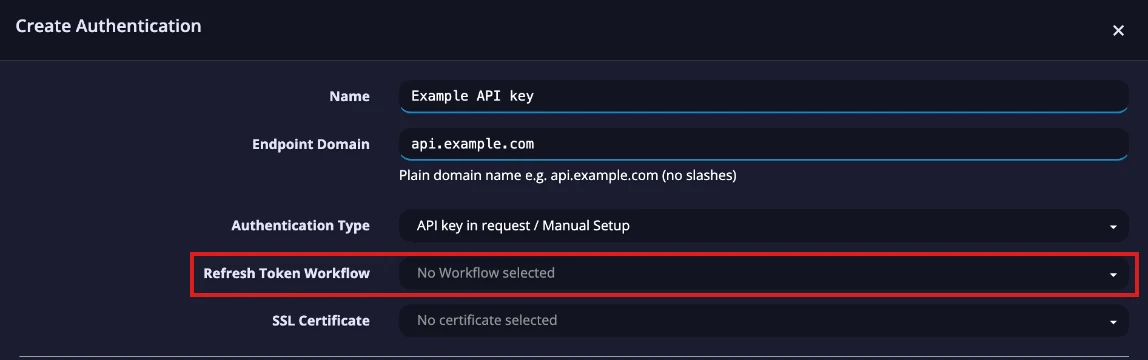
If your access token expires and supports a means to refresh it, you can use the Refresh Token workflow setting to update your access token when needed. This workflow is triggered if the scheduler tries to run a monitor and it finds the token being used is expired. It will stop and run the workflow to refresh the token before resuming.
Using manual auth, choose the workflow in the Refresh Token Workflow field of the auth setting:
Here's an example workflow that refreshes an access token

Note that we save all the variables from the workflow into the token being refreshed.