Setting up an OAuth 2.0 Authentication
Create an Authentication
In the sidebar, under Configure Monitoring, select Monitor Authentication (open it), then select Add new Auth Setting.
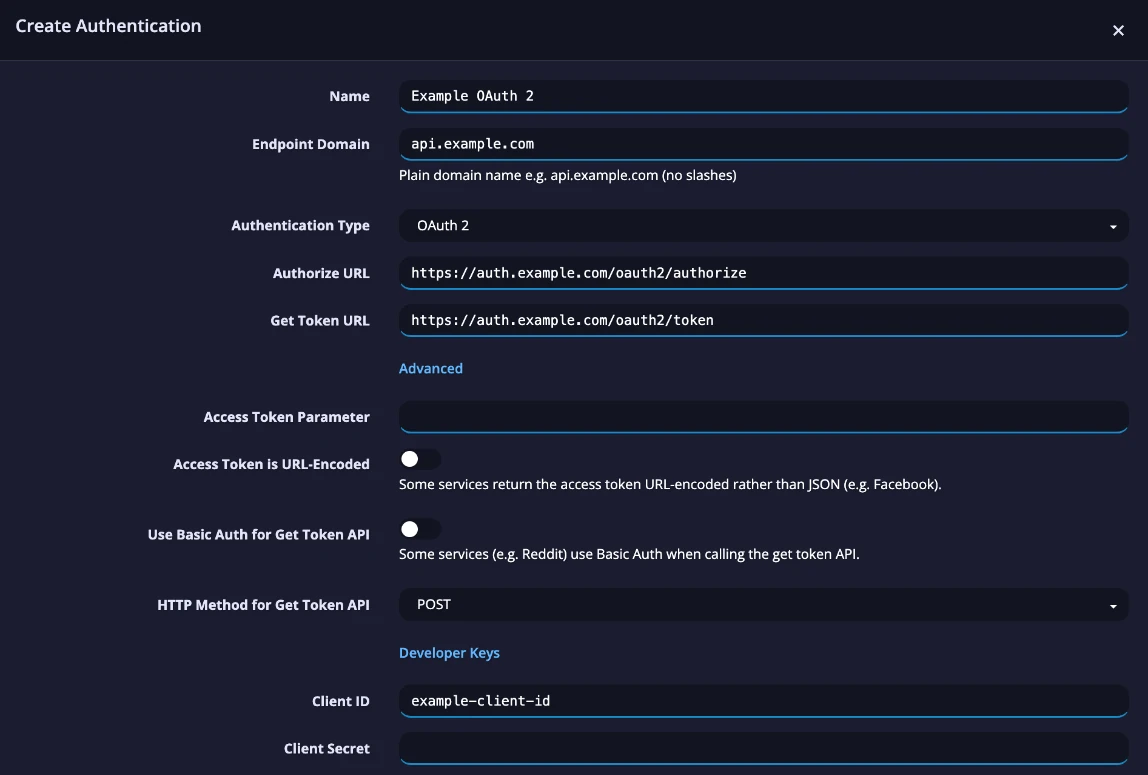
In the Create Authentication panel, set Authentication Type to OAuth 2 and complete its fields.
For OAuth 2.0, you need the Client ID and Client Secret. You usually get these from the API provider by registering an app with the provider's developer program. You also need an Authorize URL and a Get Token URL, which are in the provider's API documentation.
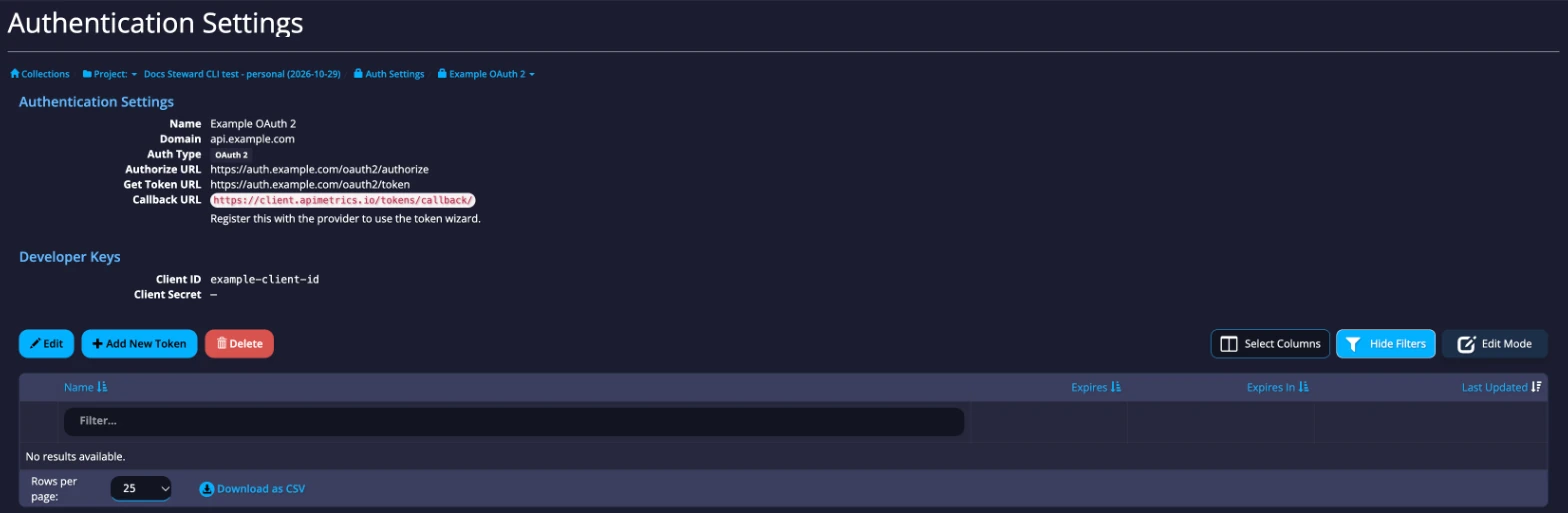
Select Save. The auth setting's page then shows its Callback URL, https://client.apimetrics.io/tokens/callback/. Register this callback URL with the API provider to use the token wizard.
Create a Token
To create the token, open the auth setting and select Add New Token. In the Add New Token panel, enter a name for the token. Under Get token from provider, choose Authorization Code or Client Credentials from the Grant Type list, as the API documentation directs. For user-authenticated calls, Authorization Code is the usual choice. Enter any scopes the API documentation requires in Scope.
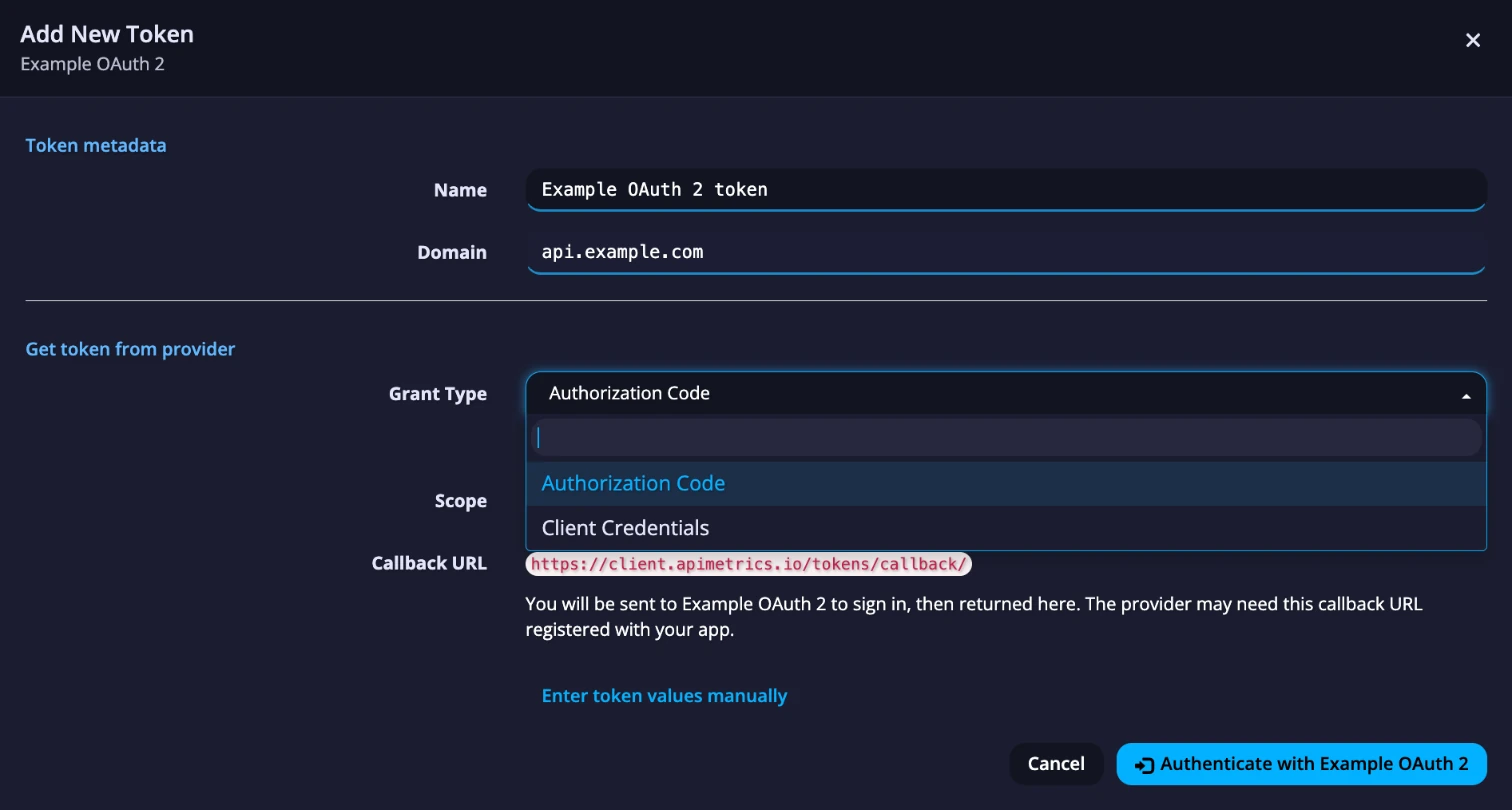
When you select Authenticate with ... (where ... is the name of the auth setting), you are sent to the provider's site to authorize the token. Sign in with an account that is associated with the Client ID and Client Secret you used.
If you are familiar with OAuth, you can also select Enter token values manually and create the token from the appropriate values. This is generally not recommended, although might be necessary in certain circumstances as often found that the automated token generation process fails for some reason. In this situation, it would normally be necessary to use a monitor to an authentication endpoint to obtain the values for the token, which would be extracted from the returned JSON payload.
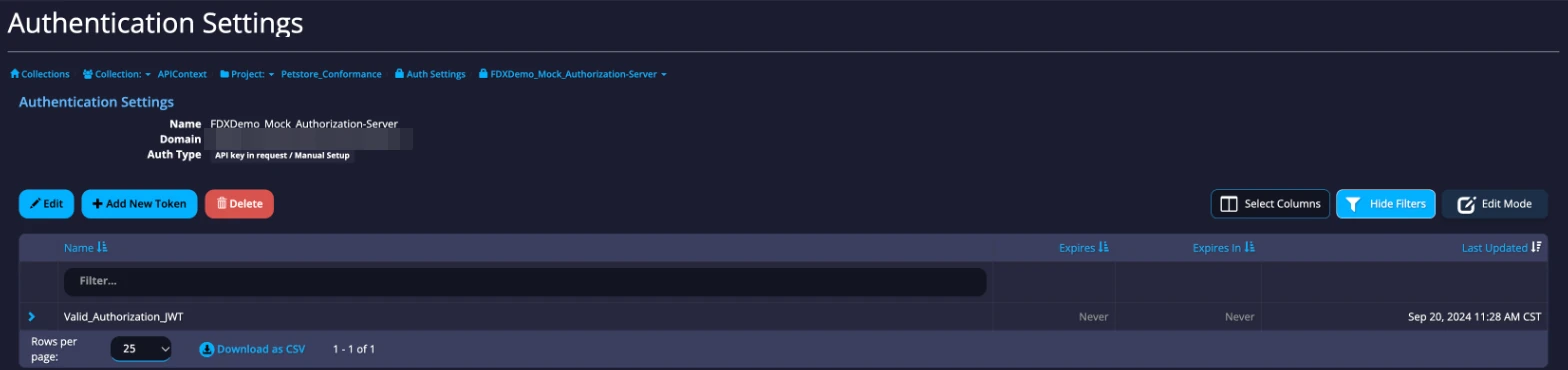
After the token generation has been authenticated by the API provider, you will be returned to APImetrics and will see the new token in your list of tokens for that API provider.
Use the Auth Settings in a call
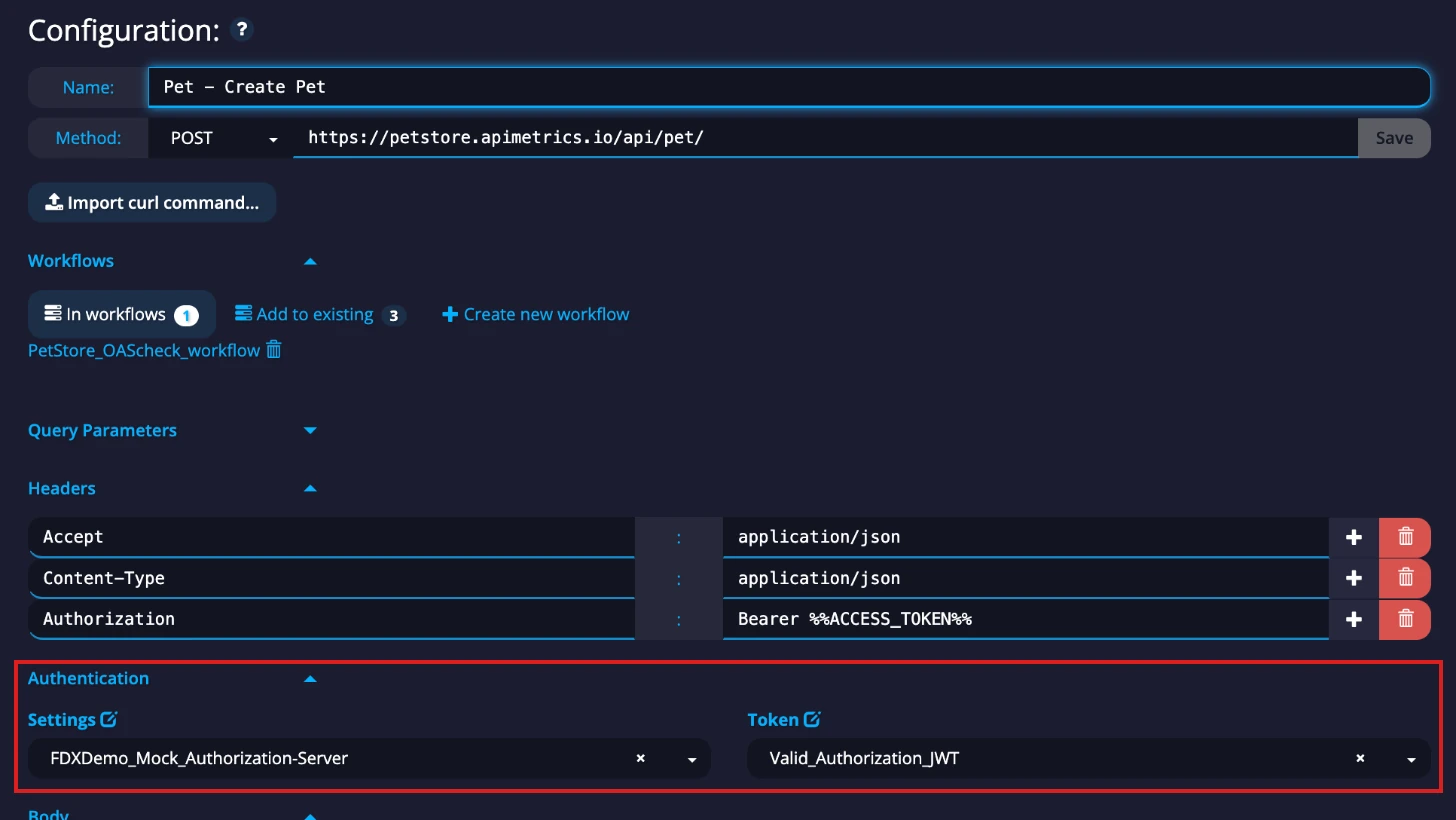
When you setup or edit a call nex that uses the authentication, you can then choose the authentication and then the associated token from the dropdowns in the call editor.