

Install with AWS CloudFront
Our Observability Adapter for AWS CloudFront networks allows you to monitor your live API traffic from AWS CloudFront, without configuring monitors manually in the APImetrics platform. By deploying this adapter, APImetrics can read monitors that are routed through AWS CloudFront, and automatically build your API Catalog. Once integrated, you can compare your live API traffic against your OAS spec, and set up synthetic endpoint monitoring automatically.
Prerequisites
There are a few things that need to be set up or in use before integrating APImetrics into your development process. You will need the following:
- An AWS account.
- A CloudFront distribution that manages content delivery for the service you wish to monitor.
- The ability to deploy a Lambda@Edge function.
There are two options for adding APImetrics to your CloudFront network, due to the nature of Lambda@Edge functions, only one function is allowed.
- If you do not currently have a Lambda@Edge function, follow the new-function instructions, which should take about 20 minutes.
- If you do currently have a Lambda@Edge function, follow the existing-function instructions, which should take about 3 minutes.
Create a new API Key for APImetrics by following the API Key tutorial and choosing Ingress as your Access Level.
Architecture
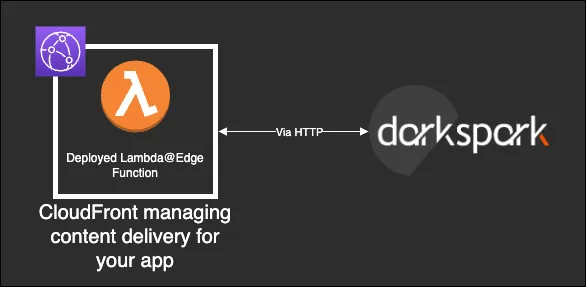
Below is a diagram of how this integration works:
Before Starting
As a best practice, always use the principle of least-privileged access when deploying new functionality into your environment, including for APImetrics. To analyze your API data, APImetrics requires access to monitor monitors.
Library for Existing Lambda@Edge Function
If you are already using an existing Lambda@Edge function, add the package as a dependency to your Lambda's source directory with the following command:
npm install darkspark-aws-lambda-edge-plug
Once you have installed the package, you can import it into your project like so:
const { useDarkspark } = require("darkspark-aws-lambda-edge-plug");
Integrate it into your handler function, by calling useDarkspark with the incoming event:
exports.handler = async function(event, context, callback) {
	await useDarkspark(event, "<your APImetrics API key>");

	// other lambda logic
	...
Handler
Create a Lambda Function
Firstly, search for Lambda in AWS.
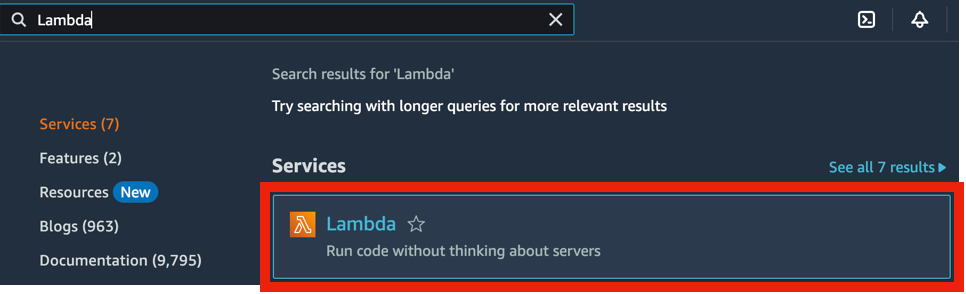
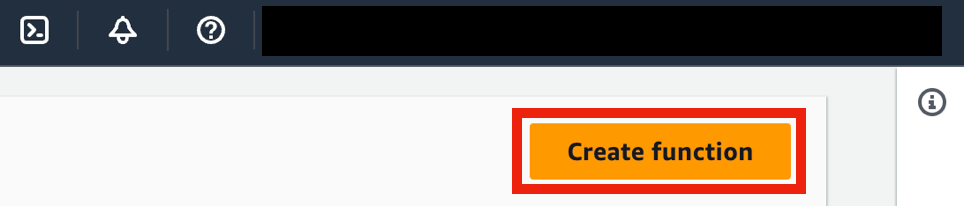
From here, create a new Lambda function.
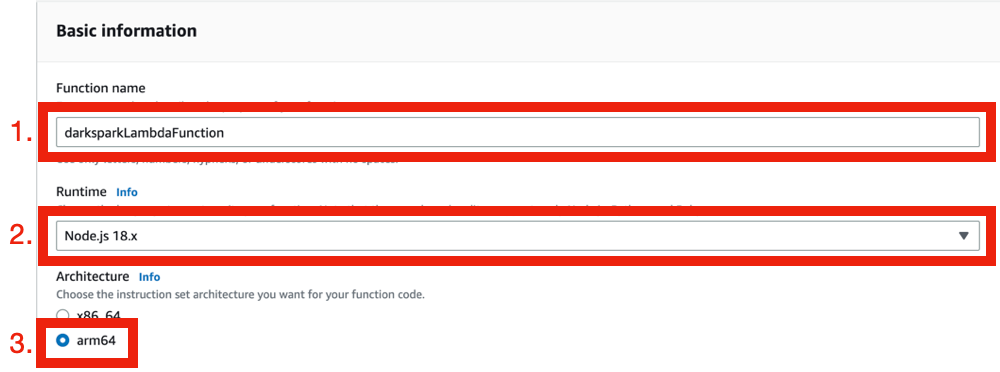
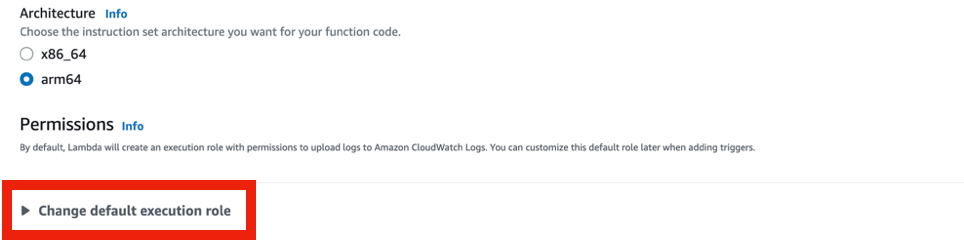
Name your Function, confirm the runtime is set as Node.js 18.x and ensure the Architecture is set to arm64.
Next, expand the Change default execution rule option.
Select Create a new role from AWS policy templates.
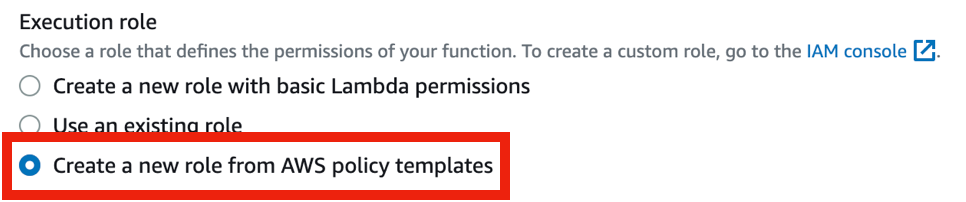
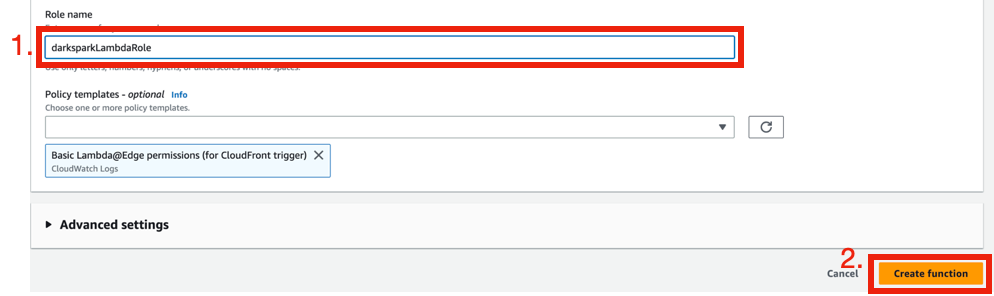
Select Policy Templates.

A search bar will pop up and you can now search for CloudFront. There will only be one option for Basic Lambda@Edge permissions.

Name this Role and Create function.
Upload & Set Darkspark as Handler
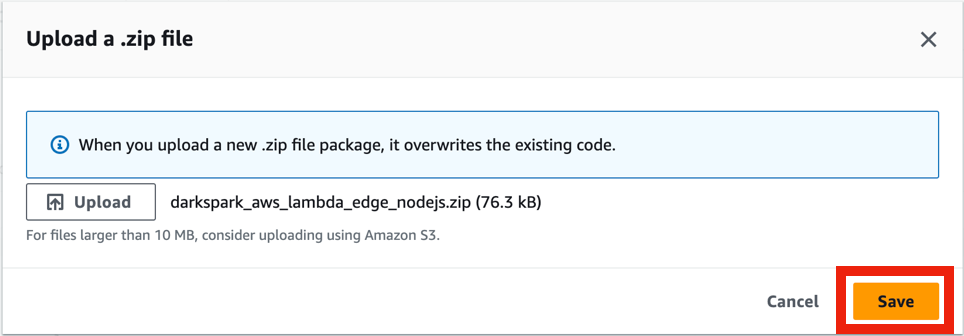
You'll automatically be taken to an overview of the new Lambda function. Select Upload from in the Code source section and choose to upload for a .zip file.

The file you need to upload can be downloaded as the Lambda@Edge package. In the upload popup, select Upload and navigate to where you downloaded the zip file and then upload.
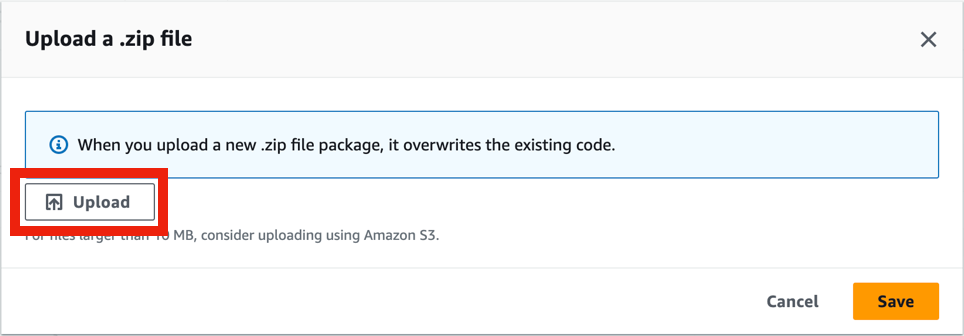
Once this file has been uploaded, select Save.
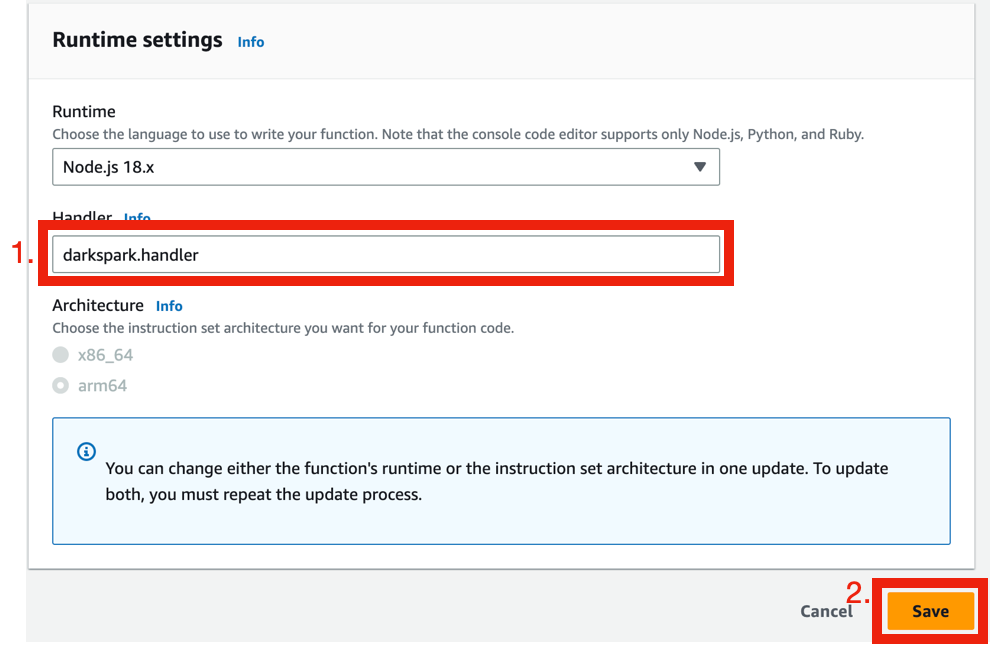
Next, go to Runtime settings further down the page and select Edit.

From here, change the handler to darkspark.handler and Save.
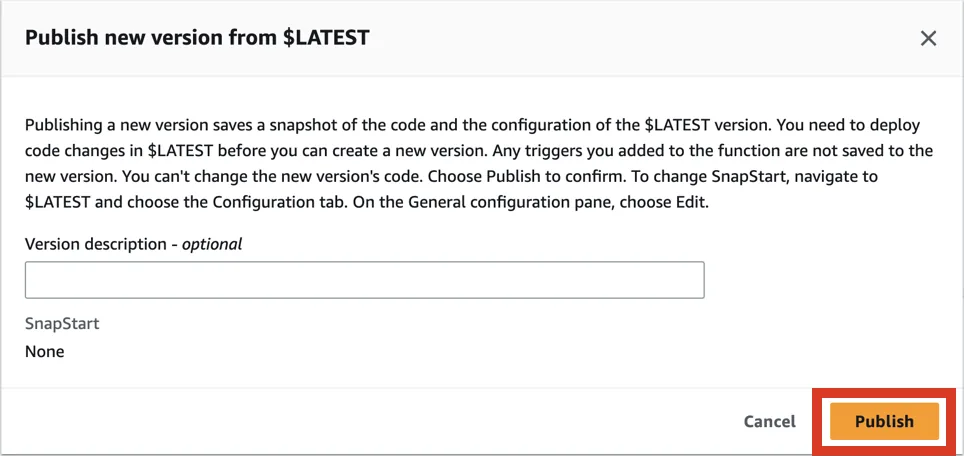
Next, go to Actions at the top of the page and select Publish new version.

You can add an optional description if you want and select Publish.
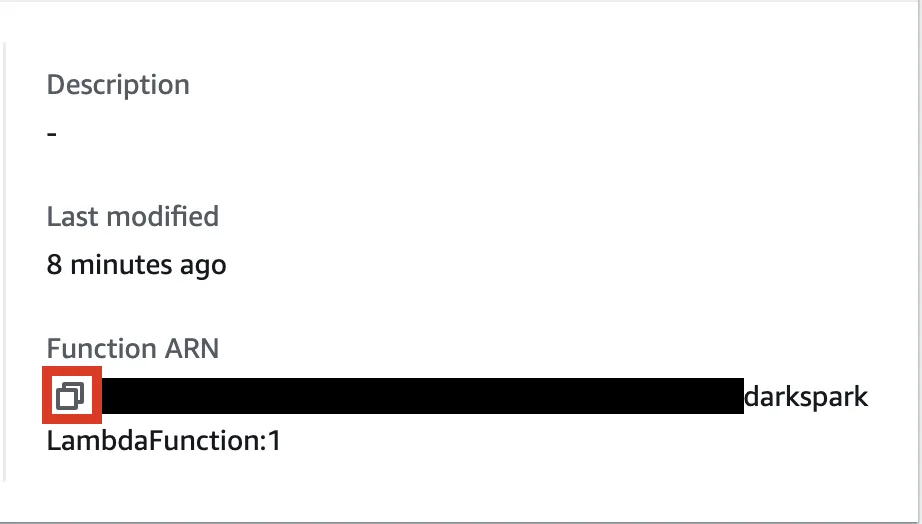
Copy the new function ARN, ensuring it has the version number at the end, i.e. :1 at the end.
Go to CloudFront & Configure the Behaviours
Search for CloudFront in AWS.
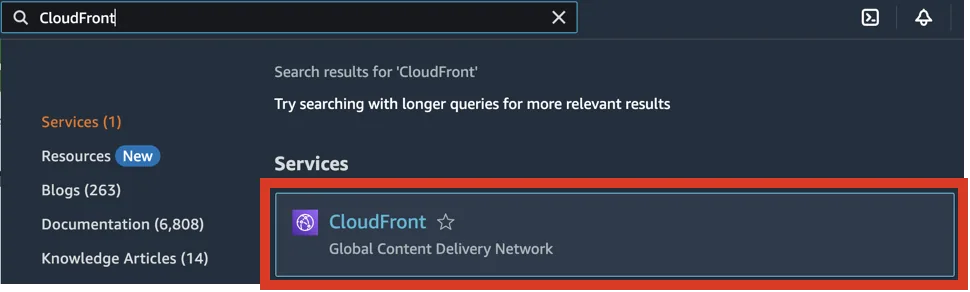
Select whichever Distribution you wish to attach APImetrics to. Select Behaviours from the tabs.

Select the behaviour you want to attach APImetrics to and press Edit.

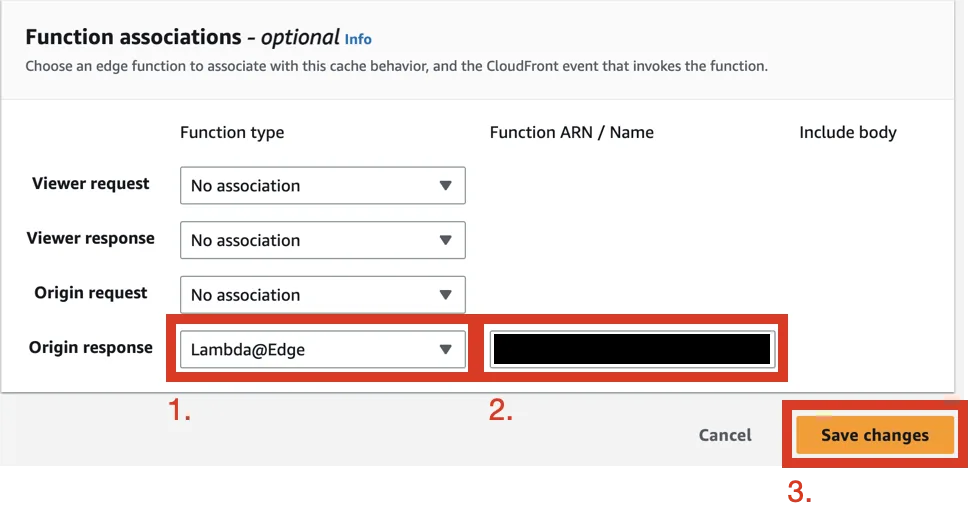
Scroll to the bottom of the options to Function Associations. Go to Origin response and then select Lambda@Edge from the dropdown and paste the copied function ARN. Finally, Save changes.
Create API Key
You will need to create a new APImetrics API Key, see the API Key tutorial. Copy the key for use later.
Add APImetrics as a Header
Return to CloudFront then select Origins.

Select the Origin you have chosen to attach APImetrics to and press Edit.

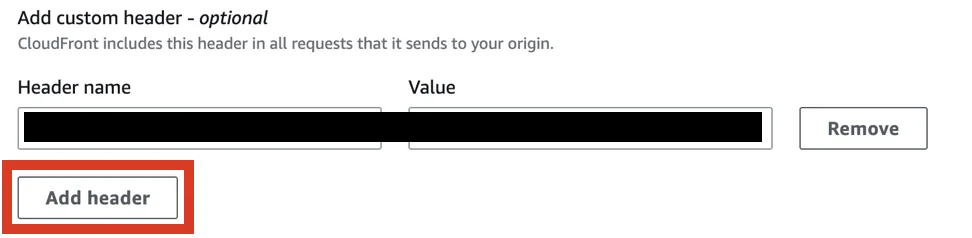
Scroll to Add custom header and select the Add header button.
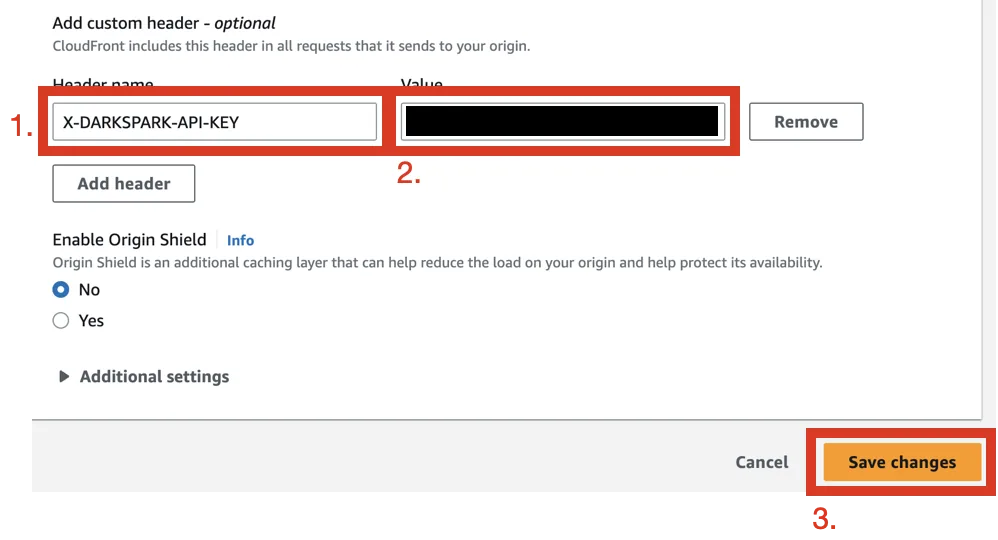
Paste x-darkspark-api-key in the Header name field and your newly generated API Key in the Value field. Then, Save changes.
This is the process complete. It will take a couple of minutes to deploy fully.
Maintenance
Want to know when we make these newest versions? Check the Changelog.
FAQ
There is an issue with the downloaded package. What do I do?
First, try and redownload the package as there might be a newer version that you missed. If this doesn't work, please feel free to contact us at [email protected].
Can I run the handler using another language?
Sadly, no. We currently only support Node.js. If you are interested in another language, please feel free to contact us at [email protected].